Showing posts with label summer. Show all posts

Friday, June 5, 2015

What's In MyTravel Makeup Bag?


Summer is finally here! Hooray! Which means it is time for travelling and vacations!


I received this train case as a gift and I have been using this every time I am on vacation. It fits nicely into my luggage and it fits all my essentials!

This is what it looks like when I put everything in there. I love that there are two removable compartments. This allow me to utilize it in so many ways. For example, if I want to carry a small makeup bag in my purse, I can use one of these compartments. Or if I have something a bit bigger to fit in the train case, I can remove one compartment. Another great thing about the compartments is that they are made out of clear plastic material, this way it is easy to clean up and I can see what is in the bag clearly. The lid of the train case is designed to carry brushes, how convenient! I just love how I can be really organized with this!

I really like having things organized, so I actually have a system of what goes into each compartment. (I guess this is why I love this makeup train case so much.) Everything is divided into 3 categories, with the obvious brush section on the lid. Then I have one just for face products. The other one is everything else. So let's talk about them section by section.

Before I start, I just want to say that many of these products are my holy grail and I have talked about them in previous posts. Please refer to other posts if you want a review on a particular product or just ask me in the comments section below.


Face Section

1) Benefit Porefessional
2) MUFE Nourishing Primer
3) Maybelline CC Cream
4) Maybelline Cover Stick
5) Rimmel Match Perfect

6) Model Co. Blush in Cosmopolitan: I got this in my Feb 2015 Glam Bag. Cosmopolitan is a ballerina pink color,. It is super pigmented, so I like to use a stipple brush to slowly build the color up. 

7) E.L.F Complexion Powder

8) Bare Minerals Powder Brush: This brush is small but it is very dense, it allows a flawless application. I really like to travel with it to save room.


ETC Section


This compartment consists of eyes related products, lip products, etc.

1)Benefit Naked Basics : MUST HAVE! It's just a perfect every day palette

2) Stila Stay All Day Waterproof Liquid Eye liner

3)Benefit Roller Lash Mascara

4)Eyelash curler: This one is by Emite Make Up, and it was from my February Glam bag as well. I really like this curler. It does not pinch my eye lids and it gives a nice curl easily.

5)Kiehl's Eucalyptus Lip Relief: It is a very hydrating lip balm, since it is meant to be used on a plane. It gives a minty and tingly feeling when you apply them. The feeling and scent lasts pretty long, and I really like it. 

6)Beauty Blender

7)Urban Decay Lipstick: This is a mini size lipstick I got from a Sephora Favorite pack. This is in the shade Naked. It is my perfect pinky nude color that looks very natural on the skin. I can wear this color with any look so I love to bring it around. The formula itself is long lasting and not drying at all!

On a side note, I really think this is a must have for everyday and especially for business formal settings or business trip. 

8)Dior Lip Glow: This is another simple every day color that goes with every look.

9)Boscia Blotting Paper: Boscia carries many different line/ scent of blotting paper. The one I have in green tea. The paper itself actually have a slight green tea scent. I like how it blots away excess oil but not drying out my skin nor wipe away my makeup. 

10)Travel/ Sample Size Fragrance: Every time I pack for my trip I will bring out my big stash of sample/ traveling perfume. Since I have so many perfume samples, I travel with a different one almost every time. This is a good time for me to really try out a perfume and it is really easy to travel with. Lately, I have been loving the Dior J'adore perfume, it has a floral scent. I think it is very summer appropriate.


Brushes


1)E.L.F. Stipple Brush
2) My Makeup Brush Set Flat top foundation
3) Angled Eye Liner Brush
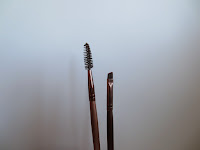
4) Angled Brow Brush
5) E.L.F Spooly Brush
6) Crown Double Ended Eye Brush
7) Luxie Beauty Fluffy Blending Brush

I did not show my face cream, toners, makeup remover, etc. because I keep them with my toiletries. Also, a lot of the skincare products I bring are from my everyday skin care routine. I will either transfer them in a smaller container or find a travel/ sample size if I can find it. If you have not already, you can check out My Everyday Skincare Routine.

I hope this is somewhat helpful for people that are traveling! If you are traveling, leave a comment/ or tweet me where you are going and share with me your essentials! If you are not traveling, you can also share with me where you want to travel to and what will you be bringing if you go on a trip! 

Follow me on my instagram @judyy116 for insta hauls and random photos! I also just signed up for a new twitter @jtingsdiary so tweet and follow me!  Let me know what other posts you would like to read!

Yours Truly,

Ting.


Find me here:
Instagram: @judyy116
Twitter: @jtingsdiary
Email: jtingsdiary@gmail.com

Monday, May 18, 2015

Spring & Summer Simple Everyday Makeup Routine


I rarely wear heavy makeup. In spring and summer especially, I like my makeup as simple as possible. Keep in mind, I have combination skin, dehydrated but occasional oily t-zone and sensitive skin. Some of the products I use may not be suitable for you but can be easily changed up to suit your skin. Also, I will be including the tools I used, just in case you're interested. (Disclaimer: a lot of the brushes you see are from My Makeup Brush Set. This is not sponsored, I purchased a big brush set from the company and I use them a lot!)

Lets get started!

Left to Right: Estee Lauder, Benefit, Maybelline
1. Benefit Porefessional 

I do not use this product all over, instead I focus it in the areas with large pores, like around the nose, chin, and area between the eyebrows. I use my hands for this (clean hands of course), I feel like using my hands can really press the product into the pores and fill them up.

2. Estée Lauder Matte Perfecting Primer
I apply this product on my T-zone using, because it tends to get oily there. This product works well at making sure the makeup stay matte. It has no scent and is really lightweight. If you  have oily skin, you can use this all over the face!

3. Maybelline Pure Mineral CC Cream SPF 37

I always wait for a few minutes for primer to sink in before applying foundation. As the weather becomes warmer, applying foundation can feel heavy. So in the spring and summer time I tend to reach for CC cream or BB Cream. The other day, I accidentally found a new trick that makes my foundation more light weight. That day I forgot to apply moisturizer before applying makeup. So I mixed the Clarins Bi-facial Serum with the Maybelline Pure Mineral CC Cream, it makes the product thinner. It applies smoother and more light weight but the coverage is still the same. I also tried this trick on different foundation, even the Estée Lauder Double Wear. 

Anyways, I use the Maybelline Mineral CC Cream because it has SPF. The product comes out white but as you apply it on the skin, it will turn into skin color. It brightens up my skin, and my skin appears more awake. I like to apply my foundation with my hand but if I need more coverage or my skin is in terrible condition, I will use the Beauty Blender instead. I just find that applying with my hands are much more convenient and it works fine. This CC Cream provides sheer to medium coverage. If you need more coverage, You might want to use BB Cream instead. CC Creams are for Color Correction. 


4. Maybelline  Concealer Cover Stick (light beige)

I have never heard anyone talk about this product. It is a creamy product in a twist up lipstick tube form which makes it easy to handle and carry around. This works on blemishes, scars and even dark circles but I use it mainly for blemishes and scars. In the summer time especially, I don't like full coverage foundations because it tends to feel cakey on the face. Instead, I like to spot treat with concealer. I apply this directly on the needed area and use the flattop foundation brush from My Makeup Brush Set to stipple it in. Because in warmer weather cream product like this becomes softer, so it is much easier to blend out..

5. Rimmel Match Perfection Concealer (light)
I am not a big fan of applying cream products on my eyes, so I use this Rimmel Match Perfection Concealer instead. This is another underrated product that people rarely talk about (Thank you +RachhLoves for introducing this) . It actually works well all over but I like it on my lids and under eyes to brighten them up! The product comes in a squeezy tube with a brush applicator, but it can get really messy. Therefore, I always squeeze it out on the back of my hand and apply it to the eye area with my fingers.


6. Urban Decay Naked Basic


I will be using my favorite eye shadow palette for the next few steps. It's the Urban Decay Naked Palette! This is my favorite because the colors are really wearable (literally!) I was really happy I found a palette like this, I bring it every where when I travel. (I'll do a separate post on this product shortly)

Left to Right: Venus, Foxy, W.O.S, Naked 2, Faint, Crave
For my brows, I mix Naked2(taupe)+ Faint(brown) for a light brown color. I apply it using an Angled Brow Brush and blend it out with a Spooly Brush both from My Makeup Brush Set.

Using the Crown Brushes' Fluffy Eye Shadow Brush, mix Foxy (pale yellow) and W.O.S. (pale nude). I apply this combo on my eye lids and under-eye area, to "set" my concealer. For everyday makeup, I tend to go with neutral colors. This combo serves 2 major purposes, it sets the concealer, provides more coverage for veins and dark circles. It's perfect for no-makeup makeup look. 


Lastly, spray some clean water or makeup mist on an Angled Eyeliner Brush and mix Faint(brown) and Crave (black). Apply this on the lash line as an eyeliner. This will give a "full lash" effect and opens up the the eyes. This is a trick, I have been using for a while because it is easier to control compared to liquid liner, it also looks more natural. Using eye shadow as eyeliner is not a new trick; however, wetting the brush before picking up the shadow color allows the color to show up more bold and last even longer. 

7. Smashbox Contour Palette 
Left: Smashbox contour brush,
Right: Small blending brush

Top to bottom: Highlight, Bronzer, Contour
I apply the contour color using the Smashbox Angled Contour Brush( came with the palette). The way I contour is like drawing a 3 on my face, basically just the temple, cheek bone and jaw line. Also on the side of my nose. and I will blend it all out with a Small Blending Brush.

For high light, I just use another Angled Brush and apply the powder( right) under the brows, down the nose and above my cheek bones. Again, blend it out with the Small Blending Brush.

The trick for a natural contour and highlight is BLENDING. So BLEND, BLEND BLEND!


8.Essence Princess Lashes Mascara

I mentioned in my first few post that I don't like using mascara(Is that normal?!) I decided to include this step because I am trying to use mascara more often, since I found a mascara that works on my lashes. First, I use the lash curler I received in an IPSY bag. The apply a thin coat of the Essence Princess Lashes Mascara. Since I like to keep my makeup simple and natural, I don't go back for a second coat.

9. Dior Addictive Lip Glow (coral/ pink)

Photo from Sephora.ca/ left to right: Original and Coral

I have been obsessed with the Dior Lip Glow, so I always reach for them. I have both the original one and the coral one. To be honest, I literally pick them up randomly from my makeup drawer because both are everyday color that works well with neutral eye look.

10. Rimmel Stay Matte (translucent)


Using my Big Powder Brush, I pick up the translucent powder and tap it on my arm to get rid of extra powder. I then apply it on my face starting with the t-zone, this is where it's most needed and the majority of the powder will be on here. Using the left over product, I will lightly dust over other areas. If you have dry skin like me, I recommend "spot set" your makeup with powder and use a setting spray on the rest of the face.

Last step is something a lot of people forget, but I find it important. I like to finish my routine with brushing off excess makeup my large fan brush so I won't look all powdery.


That's it, I'm ready to go! It's usually take me about 5 to 10 minutes to finish my makeup so if you are in a hurry or does not like using too much product, you can try this routine out! Share with my your favorite makeup product in the comments below and share this post if you liked it! Thank you :)


Yours Truly,


Ting


Find me here:
Instagram: judyy116
Twitter: judyting116